Easy Weeknight Crockpot Beef Chili with Beans
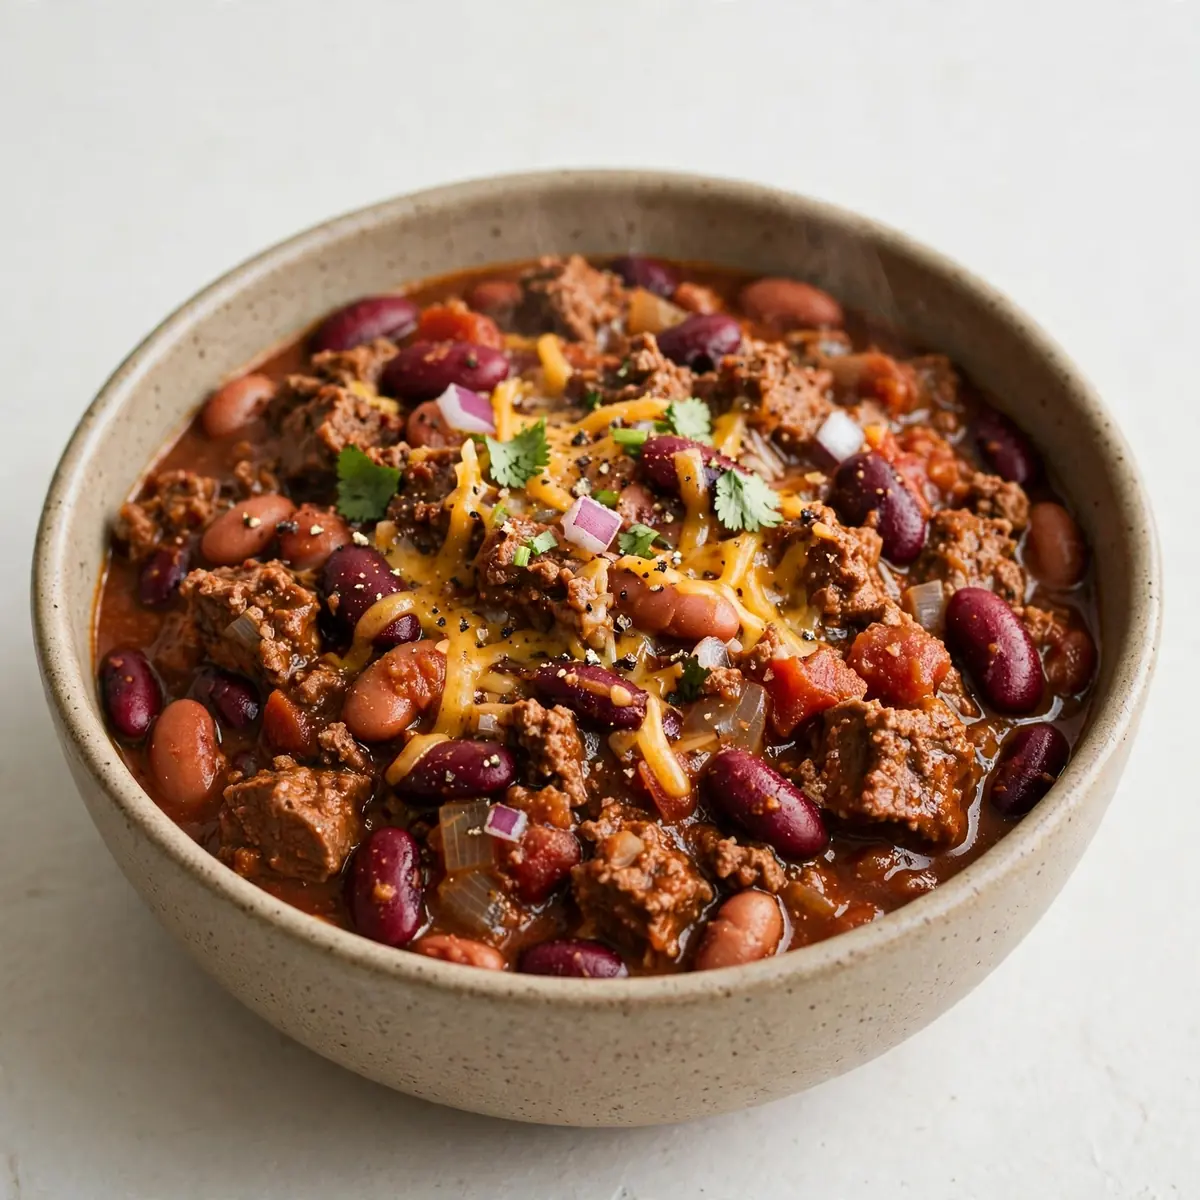
There are some evenings when the clock seems to move faster than I can keep up, and the thought of a complicated dinner makes me want to hide. That is exactly why I developed this recipe for Crockpot Beef Chili with Beans—it is the weeknight warrior you never knew you needed. Dump it in, walk away, and come back to a dinner that tastes like you spent hours over the stove, all while using just one pot and making next to no mess.
Recipe Overview
- Prep Time: 15 minutes
- Cook Time: 6 hours on low (or 3 hours on high)
- Total Time: 6 hours 15 minutes
- Servings: 8 generous portions
- Difficulty: Easy (truly a dump-and-go meal)
Why You’ll Love This Crockpot Beef Chili with Beans
- Minimal hands-on time: You spend about 15 minutes browning the beef and chopping onions; after that, the slow cooker does every single bit of the work. No stirring, no watching, no fuss.
- One-pot cleanup: Everything cooks in the crockpot insert. That means one bowl to wash at the end, plus the pan you used for browning. My sink has never been happier.
- Make-ahead and freeze-friendly: This chili tastes even better the next day, and it freezes like a dream. I always double the batch so I have ready-made dinners for those frantic midweek scrambles.
- Kid-approved and customisable: My kids absolutely devour this every time I make it. The flavour is deep but not overly spicy, and everyone can add their own toppings—cheese, sour cream, or a dollop of yoghurt—to make it their own.
- Budget-friendly ingredients: Canned tomatoes, beans, and minced beef keep the shopping list affordable. You do not need any fancy cuts or special pantry items to get a rich, satisfying meal on the table.
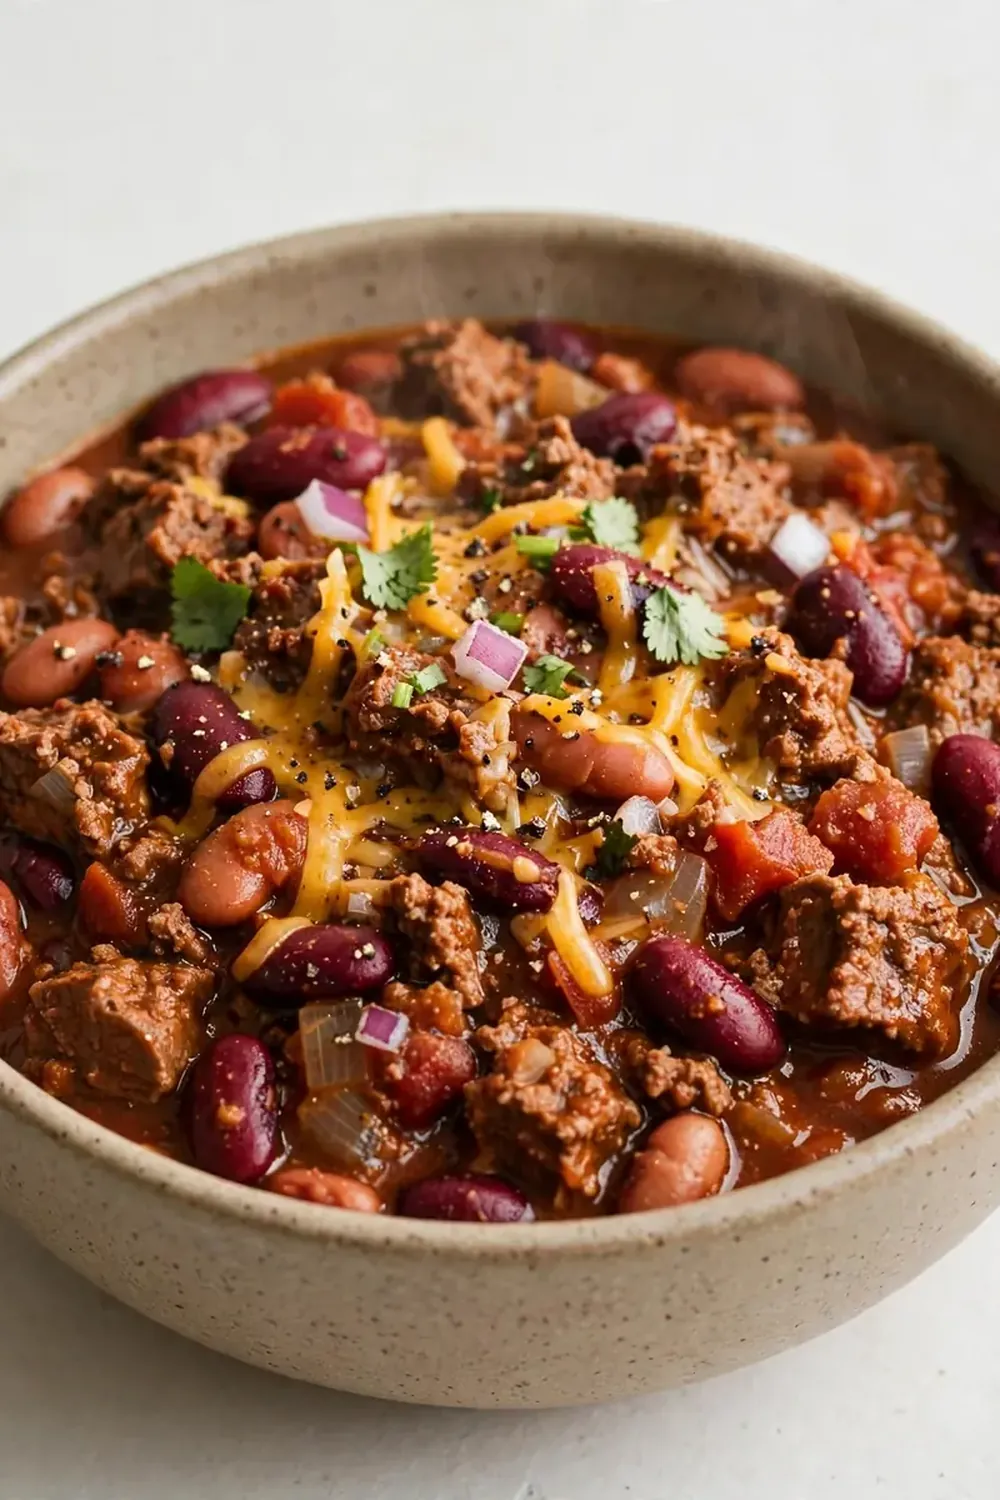
Ingredients You’ll Need
- 1 kg minced beef (15–20% fat is best for flavour)
- 2 tablespoons olive oil
- 2 large onions, finely diced
- 4 cloves garlic, minced
- 2 tablespoons tomato purée
- 800 g canned chopped tomatoes (2 standard tins)
- 400 g canned kidney beans, drained and rinsed
- 400 g canned black beans, drained and rinsed
- 300 ml beef stock (low-sodium if possible)
- 2 tablespoons smoked paprika
- 1 tablespoon ground cumin
- 1 teaspoon dried oregano
- 1 teaspoon salt (or to taste)
- ½ teaspoon black pepper
- 1–2 teaspoons chipotle paste or a pinch of cayenne (optional, for gentle heat)
Tip: For the deepest flavour, use full-fat minced beef and do not skip browning it. That step builds the savoury foundation that makes this chili taste slow-cooked all day long.
How to Make Crockpot Beef Chili with Beans
- Brown the beef: Heat the olive oil in a large frying pan over medium-high heat. Add the minced beef in two batches (do not crowd the pan) and cook until it is deeply browned, about 6–8 minutes per batch. You will hear a satisfying sizzle, and the meat will turn from pink to a rich, dark brown with crispy edges. Break it up with a spoon as it cooks. Transfer the browned beef to the crockpot insert.
- Sweat the aromatics: In the same pan (no need to wash it), add the diced onions. Cook over medium heat for 4–5 minutes until they become translucent and soft. You will see them turn golden at the edges, and the smell will be sweet and savoury. Stir in the minced garlic and tomato purée, and cook for 1 more minute until the purée darkens and smells intensely tomatoey.
- Deglaze the pan: Pour about 100 ml of the beef stock into the pan and scrape up any browned bits stuck to the bottom. This is where so much flavour hides. The liquid will bubble and release all that caramelised goodness. Pour everything into the crockpot.
- Add the remaining ingredients: Tip in the chopped tomatoes, both types of beans, the rest of the beef stock, smoked paprika, cumin, oregano, salt, pepper, and chipotle paste if using. Stir everything together until the colour is a uniform deep red and the spices are fully incorporated. The smell at this stage is already incredible—smoky and earthy.
- Slow cook: Cover the crockpot with the lid and cook on low for 6 hours or on high for 3 hours. After about 4 hours on low, the chili will start to thicken and the liquid will reduce. You will notice the aroma filling your kitchen, a warm and inviting mix of tomatoes, cumin, and beef. Do not lift the lid too often—every time you do, you let out heat and extend the cooking time.
- Check and adjust: After 6 hours on low, the chili should be thick and hearty. The beef will be tender and shred apart easily with a spoon. Taste it and adjust the salt or add a little more cumin if you want a bolder flavour. If it seems too thin, leave the lid off for the last 30 minutes and cook on high to let some liquid evaporate.
- Rest before serving: Turn off the slow cooker and let the chili sit, covered, for 10–15 minutes. This resting time allows the flavours to meld together and the texture to settle. You will see the steam reduce and the chili become even glossier and more cohesive.
Tips From My Kitchen
- Brown the beef in batches: If you pile all the meat into the pan at once, it will steam instead of sear. Steam means pale, grey meat with little flavour. By browning in two batches, you get deep caramelisation, which is the secret to that rich, savoury taste. You will see the beef turn a dark mahogany colour—that is what you are after.
- Use the right beans: Kidney beans and black beans hold their shape well during long cooking and have a creamy interior. Avoid canned baked beans or any beans in sauce, as they will make the chili too sweet and mushy. Always rinse your beans to remove excess sodium and that metallic taste from the canning liquid.
- Layer your spices wisely: Adding the smoked paprika and cumin at the beginning, when you sweat the aromatics, toasts them slightly and wakes up their oils. If you add them at the very end, they will taste raw and dusty. For the best results, stir them into the onion mixture for 30 seconds before adding the liquid.
- Thicken without cornflour: If you want an even thicker chili, mash half a cup of the cooked beans against the side of the crockpot with a fork and stir them back in. This releases their natural starches and thickens the sauce without any need for cornflour or slurry. You will notice the texture become velvety and rich.
- Make it a freezer staple: This chili freezes beautifully for up to three months. Let it cool completely, then portion it into airtight containers or freezer bags. I make this at least once a week—it’s become a family favourite—and I always save half for later. On a busy night, just defrost in the fridge overnight and reheat on the hob or in the microwave.
- Double the recipe with ease: Most slow cookers can handle double the ingredients without any trouble. If you are feeding a crowd or want extra portions for the freezer, simply double everything and increase the cooking time by about one hour on low. The flavour only gets better.
Common Mistakes to Avoid
- Overcrowding the pan: When browning the beef, if you add too much meat at once, the pan temperature drops and the meat releases water. Instead of browning, it boils. The result is pale, flavourless mince. Always cook in batches—you will hear a loud sizzle when the pan is hot enough, and that sound tells you you are on the right track.
- Wrong temperature: Cooking chili on high the entire time can make the beef tough and the beans mushy. Low and slow is the way to go. Six hours on low gives the connective tissues in the beef time to break down, resulting in tender, melt-in-your-mouth meat. If you are short on time, three hours on high works, but the texture will not be quite as luxurious.
- Skipping the rest time: I know it is tempting to ladle the chili straight into bowls, but letting it rest for 10–15 minutes off the heat makes a noticeable difference. During this time, the starches from the beans continue to thicken the sauce, and the flavours settle and harmonise. You will see the chili become glossier and more unified in colour—a sign that it is ready to serve.
Delicious Variations to Try
- Spicy Version: If you like heat, add one finely chopped fresh jalapeño (seeds included) along with the onions. You can also stir in a tablespoon of chipotle paste or a teaspoon of cayenne pepper. The chili will have a warm, smoky heat that builds gradually. Serve with sliced fresh chilli on top for extra fire.
- Vegetarian/Vegan Option: Swap the minced beef for 400 g of cooked green lentils or two 400 g tins of black beans, plus an extra 200 ml of vegetable stock. The lentils provide a meaty texture and absorb the spices beautifully. You can also add chopped mushrooms for extra savoury depth. The cooking time remains the same.
- Different Protein: Minced turkey or chicken work wonderfully here, though they are leaner, so add an extra tablespoon of olive oil when browning to keep them moist. For a chunkier texture, use diced stewing beef instead of mince—just brown the cubes well and cook on low for 7–8 hours until fork-tender.
What to Serve With Crockpot Beef Chili with Beans
- Warm cornbread or crusty bread to mop up every last drop
- A dollop of soured cream or Greek yoghurt for creaminess
- Grated cheddar or Monterey Jack cheese
- Fresh coriander leaves and sliced spring onions
- Lime wedges to squeeze over just before eating
- A simple green salad with a tangy vinaigrette to balance the richness
If you are looking for another hearty meal that comes together quickly, try my Grilled Beef Burgers with Caramelized Onions for a stovetop option, or the Creamy Lemon Chicken Orzo Soup when you want something soothing and light.
Still hungry for ideas? You might also love Crockpot Classic Chili For Winter, Beef And Bean Chili Award Winning from our sister kitchens.
Frequently Asked Questions
Crockpot Beef Chili with Beans
Ingredients
Method
- Brown the beef: Heat the olive oil in a large frying pan over medium-high heat. Add the minced beef in two batches (do not crowd the pan) and cook until it is deeply browned, about 6–8 minutes per batch. You will hear a satisfying sizzle, and the meat will turn from pink to a rich, dark brown with crispy edges. Break it up with a spoon as it cooks. Transfer the browned beef to the crockpot insert.
- Sweat the aromatics: In the same pan (no need to wash it), add the diced onions. Cook over medium heat for 4–5 minutes until they become translucent and soft. You will see them turn golden at the edges, and the smell will be sweet and savoury. Stir in the minced garlic and tomato purée, and cook for 1 more minute until the purée darkens and smells intensely tomatoey.
- Deglaze the pan: Pour about 100 ml of the beef stock into the pan and scrape up any browned bits stuck to the bottom. This is where so much flavour hides. The liquid will bubble and release all that caramelised goodness. Pour everything into the crockpot.
- Add the remaining ingredients: Tip in the chopped tomatoes, both types of beans, the rest of the beef stock, smoked paprika, cumin, oregano, salt, pepper, and chipotle paste if using. Stir everything together until the colour is a uniform deep red and the spices are fully incorporated. The smell at this stage is already incredible—smoky and earthy.
- Slow cook: Cover the crockpot with the lid and cook on low for 6 hours or on high for 3 hours. After about 4 hours on low, the chili will start to thicken and the liquid will reduce. You will notice the aroma filling your kitchen, a warm and inviting mix of tomatoes, cumin, and beef. Do not lift the lid too often—every time you do, you let out heat and extend the cooking time.
- Check and adjust: After 6 hours on low, the chili should be thick and hearty. The beef will be tender and shred apart easily with a spoon. Taste it and adjust the salt or add a little more cumin if you want a bolder flavour. If it seems too thin, leave the lid off for the last 30 minutes and cook on high to let some liquid evaporate.
- Rest before serving: Turn off the slow cooker and let the chili sit, covered, for 10–15 minutes. This resting time allows the flavours to meld together and the texture to settle. You will see the steam reduce and the chili become even glossier and more cohesive.
Notes
I hope this Crockpot Beef Chili with Beans becomes as beloved in your kitchen as it is in mine. It is the kind of dinner that brings everyone to the table with smiles, and the best part is how little effort it takes from you. Have you made it yet? I would love to hear how it turned out—drop a comment below and let me know your favourite toppings or any twists you added.